I do much of the post-production editing for the two podcasts that I’m on: Worst Case Scenario with Baz Taylor and David Sims, and Atlantic 302 with Pat Carroll. Some people have been kind enough to compliment the production quality of the podcasts but I’m still frustrated when I hear how good some of my favourite podcasts sound. I’m still learning about this stuff, and I know I have a long way to go, but I thought I would document my current method. Critiques welcome!
I’m indebted to Jason Snell of SixColors who wrote a very detailed guide on how he edits his podcasts. Much of this guide is based on Jason’s recommendations. Like Jason, I use Logic Pro X for editing, specifically for its Strip Silence function which isn’t available in GarageBand. I add an extra pre-production step of noise reduction in Audacity, as an unacceptable level of hiss was creeping into the recordings without this.
Recording
We sometimes record in person, but most of our episodes are recorded remotely. We sit in our own houses and chat over Skype. We don’t actually record the Skype call, instead we each record our own audio locally and then I mix it together later. We have a pre-recording ritual which consists of three steps:
- I count us in to hit Record in GarageBand. This means that the audio tracks will start at roughly the same point.
- I ask for five seconds of silence at the start of recording. This provides a convenient place at the start of each track to get a sample of background noise for noise reduction.
- I turn up the volume on my headphones, hold the headphones to my mic, and ask each host to talk into their microphone separately. This marks a point where the same audio is appearing both on my audio track (through the headphones) and on the host’s track, identical audio which allows me to sync up the tracks. Of course it’s not truly simultaneous as Skype introduces latency, but it’s good enough.
Sharing
The other hosts on the podcast then send their GarageBand files to me. Baz and Dave are users of the native macOS Mail app, which has a feature to send large files called MailDrop. For Atlantic 302, Pat and I have a shared Dropbox folder that he copies his file over. I mention this because the files involved are large: Atlantic 302 is a 30-minute show and our separate audio files are about 270Mb. Editing podcasts takes up a lot of disk space! (As a side note, I save my working podcast files in a subfolder of Downloads, and exclude the Downloads folder from Time Machine, to prevent backups getting too big).
Export
GarageBand has a default voice recording setting, which adds lots of effects such as reverb. The GarageBand interface is a little confusing, so I created a blank ‘patch’ with no effects whatsoever. I apply this patch in the Library before exporting. I’ve uploaded this blank patch in case you want to use it: it needs to be copied to
~/Music/Audio Music Apps/Patches
– you’ll need to create this folder if it doesn’t exist already.
I export each GarageBand file using the Share > Export Song to Disk menu command, and I save as an uncompressed 16-bit AIFF file. Rather annoyingly, this step creates a stereo AIFF file even though the recorded track from the microphone is mono, I haven’t bothered to figure out how to change this, so I just continue the rest of my workflow in stereo, and then convert to a mono MP3 file at the end.
Noise reduction
Our recordings tend to contain some hiss. If this hiss isn’t removed, it can be amplified at a later stage when applying compression. I use Audacity’s noise reduction function to pretty aggressively reduce noise in the AIFF files before dragging them in to Logic. I open a blank audio file, hit Cmd-Shift-I and select the AIFF for editing. I find the section of the audio at the start where everyone is silent, and select most of it, checking that there isn’t any breathing or noise that isn’t present through the whole recording. Then I select Effect > Noise Reduction and click Get Noise Profile to sample the background noise. I deselect the audio previously selected (important to do this, or the next step will only reduce the noise on the selection) and select Effect > Noise reduction again. You’ll notice there are lots of parameters to adjust, here are the settings that I use, chosen out of trial and error:
 Noise reduction (dB): 24; Sensitivity 11.50; Frequency smoothing (bands): 10. The last option, Noise: , should be set to Reduce, not Residue.
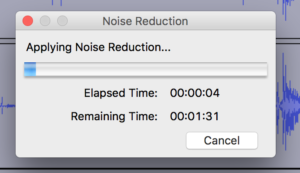
This takes a long time, typically nearly two minutes on my 2015 MacBook Pro. I use this time to start exporting the other tracks from GarageBand, and dragging completed files into Logic Pro X. Once the noise reduction has finished, I choose File > Export Audio, and export as another 16-bit AIFF file.
Logic Pro X
Logic Pro X costs €200 in the Irish Mac App Store. I know this is a huge amount – which is why I edited the first few episodes of Worst Case Scenario in Audacity. But Logic has one feature called Strip Silence which saves a huge amount of time and I’m much quicker at editing once I switched.
To start, create a project in Logic. It doesn’t matter what input settings you use, as you will be importing the previously-recorded tracks. Drag your tracks in, you can even drag them in one go, if you do just make sure that you ‘create separate tracks’ in the dialog. Once you have done this, you can delete the original empty track that Logic added for you.
Syncing audio tracks
By now you should have your three audio tracks in Logic. To sync them up, I look for the audio at the start of the file where each host speaks into my mic via my headphones (described earlier). I drag each track to the left and right around this point until the audio is roughly in sync. I find it helpful to zoom in (by pinching the trackpad) to do this, you can sometimes align visually using the waveforms on the track.
Audio effects and EQ
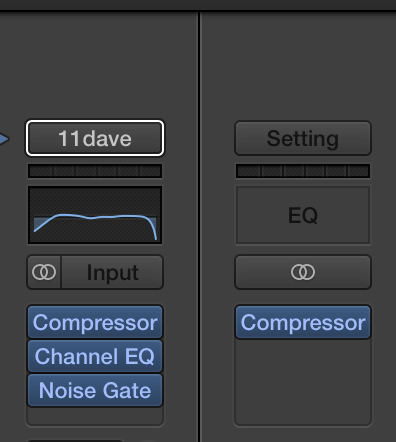
I apply previously saved patches for my co-hosts. You can download these patches: Thomas, Dave, Baz, Pat (you add these to the same folder as the blank patch explained above – Logic and GarageBand use the same plugins in the same folders). These patches contain an EQ (to emphasise and de-emphasise different sound frequencies), a compressor (to make quiet noises louder) and a noise gate (to ignore sound below a certain level). They are different based on certain factors, Baz, Pat and I use the same Pyle dynamic microphone but Baz and I both have fairly quiet voices, so they need boosting. Dave uses a Rode condenser microphone, which provides a lovely loud sound (the Pyle mics are very quiet) but tends to pick up more background noise. For my own patch, I added an extra DeEsser plug-in, as my ‘s’ sound is very hissy. Finally I add a master compressor on the output (it’s listed under Dynamics > Compressor) which effects all tracks, I turn up the compression to 3 and leave everything else at the default.
I try to avoid any clipping on the output meter (any positive number is clipping and will be shown in red), and will tweak the individual track compressor if someone’s audio is clipping, normally using the Make Up knob.
Strip Silence
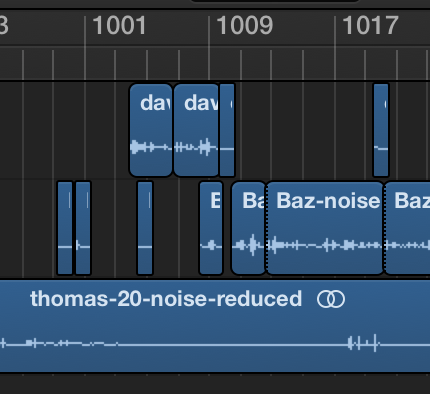
Now we get to where Logic earns its €200: the Strip Silence feature. This essentially translates a single continuous audio track into ‘blocks’ where someone is actually talking. This makes editing so much easier. The keyboard shortcut for Strip Silence is Ctrl-X (make sure you have the track highlighted), the settings I use are a tweaked version of Marco Arment’s recommendations – 2%/0.6/0.2/0.3 for those of us using dynamic microphones. I change the threshold to 4% for Dave’s microphone: as a condenser it picks up more background noise. As Marco points out, annoyingly Logic doesn’t remember your choices so you have to manually enter these in for every editing session.
Select following
At this point I delete all the chatter before the show starts, and I start editing proper. The one disadvantage of using Strip Silence is that you are left with a lot of empty sections where there are sections of the podcast where nobody is talking. This can be noticeable to the listener (depending on the background noise), so a lot of my editing work involves moving audio ‘back’ so there is no overlap. When you are faced with a period of silence, you want to select the next ‘block’ after the period of silence, and then use the Shift-F to select all blocks of audio following this block. You can then drag the audio back so that it cuts in just after the last person has finished talking.
Editing
As well as removing silences, you’ll often want to cut bits out. In the early days of Worst Case scenario, I was obsessive in cutting every last ‘um’ and ‘ah’, especially with my own voice. I’ve calmed down a bit now I’ve got used to listening my own voice (this took quite a while) and realising that these artefacts appear in everyday speech and the brain is incredibly good at filtering them out.
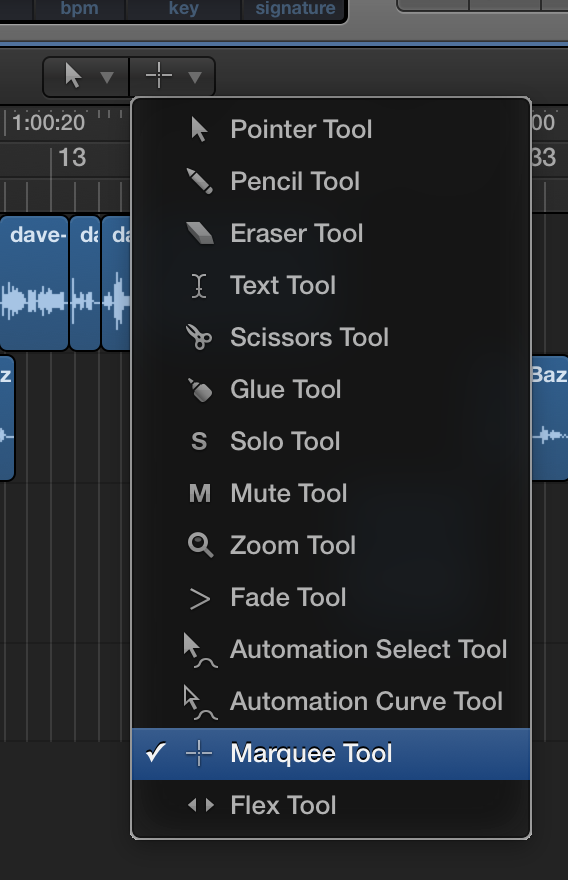 I do remove any bumps, clicks or any other background noise that I think might distract the listener. Often the noise is in a single block so I can just click and delete. Sometimes you need to divide up a block of audio, the fastest way to do this is to set Logic’s secondary editing tool to be the marquee tool (see graphic). The primary tool should be the pointer tool. The secondary editing tool is invoked by holding down Cmd. You can use the marquee tool to drag over a selection of audio you want to delete, or by clicking once and hitting backspace you can split a block into two pieces.
Intros
On Atlantic 302 we use a spoken word intro and outro that myself and Pat take turns doing and which is recorded at the same time as each episode. For Worst Case Scenario, we use a short noise that Dave created while messing around with an app called cfxr, a little app that creates various sound effects. I turn the input volume down to -13db because otherwise the master compressor will make it too loud.
Export to iTunes
I prefer to export the song to iTunes as an AIFF (File > Share > Song to iTunes). The only metadata I add is the track name. From iTunes I have the export format set as 64 kbps mono (iTunes > Preferences > CD Import Settings > MP3 Encoder > Custom > 128kbps stereo bit rate + mono) so I just convert to MP3 after the AIFF is imported from Logic. Finally I right click the MP3 and Show In Finder to locate the file.
